I would like to welcome Denise Crites to the Lima ReStore blogging team. Denise is a frequent ReStore shopper as well as a decorative painter. She upcycles many of the items that she buys at the ReStore and elsewhere to sell at Thistledew Restorations. Check out her FaceBook page!! I asked her to describe the transformation process for one of her ReStore finds…
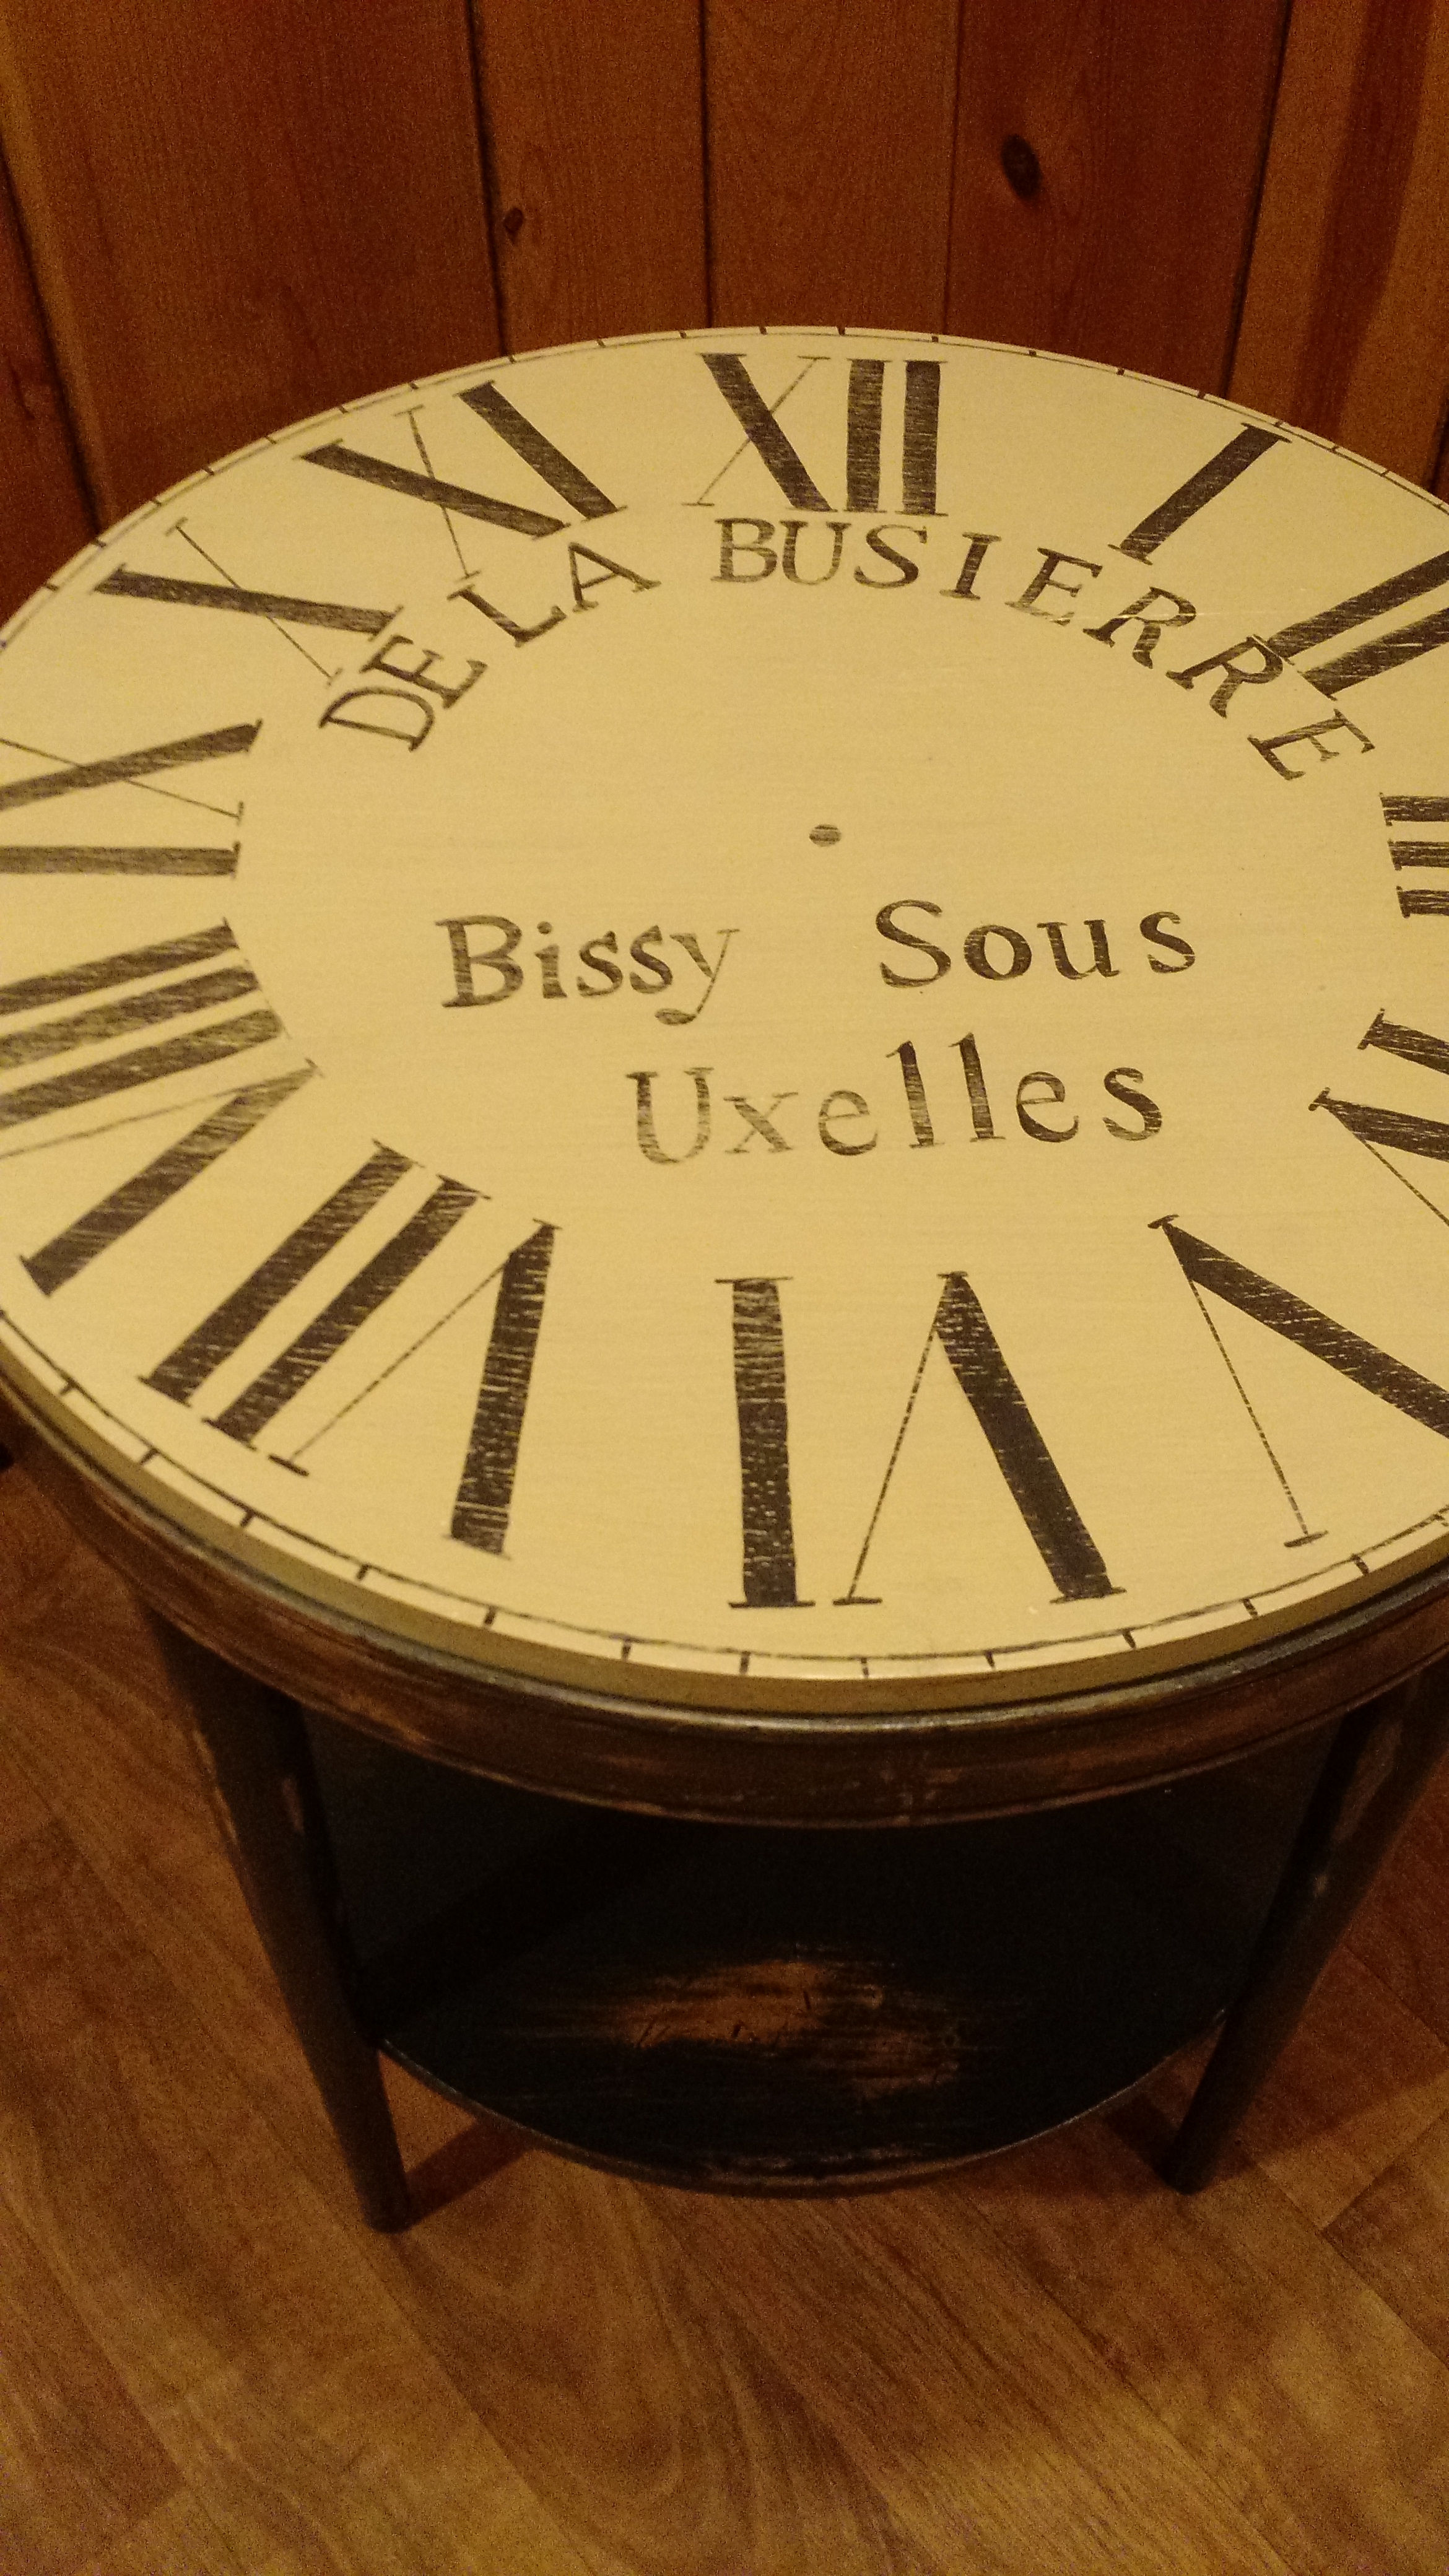
I will explain the technique on the used table that I turned into the clock table since it’s a pretty simple one. My fingers tend to get ahead of my brain so I had my first coat of paint on before I realized I didn’t take a “before” picture. And was it a sight to see. It was covered on top with 1960’s style contact paper and the rest of it was that yellow wood from the same era.
But I could see what it could be.
So, first I stripped the contact paper off and gave it a good scrubbing and sanding. When it comes to the actual painting I use anything from chalk paint to artist acrylics to the “oops” latex paint from the ReStore. This table I wanted in dark gray, so I used a dark gray chalk paint from Hobby Lobby. However it was a little too much on the blue side when I first applied it. So I added burnt number artist acrylic until it was the shade I wanted.
Don’t be afraid to mix colors if the one you have isn’t exactly right. A little white or gray or brown can make it perfect. I often add ivory to white to get a soft white.
Anyway, back to the table. Two coats gave perfect coverage. While that was drying, I painted the top with Decoart Antique White. Then I let it all dry. Meanwhile, I taped pieces of tracing paper together until it was the size of the table top. I always draw up my pattern on tracing paper. That way it is ready to transfer and can be reused. Then, I traced off the size of the table top. The numbers and letters are done from a set of stencils that I got…. where else!? The Restore! However there are many sets available at any craft store.
For the numbers, I started with the 12, 3, 6, and 9 spaced evenly around the top. Then I evenly spaced the other numbers in between. These were traced onto the tracing paper around the stencil. For the lettering, I drew an arch and lines where I wanted it to go. Then, I used the stencil sizes I wanted to draw it out. I find it easiest, in order to have everything turn out even, to start in the middle of the line and work out. At this point, I traced the design onto the table with graphite paper. I then painted the design with charcoal paint using a no. 5 round brush and script liner for the fine lines on the Roman numerals. Since I have a steady hand, I added the lines around the border for “minutes
Once this was dry, I erased any stray marks and lightly sanded the top with 180 grit sandpaper. Then, I sanded the rest of the table a little heavier so more wood showed thru. I wiped off any dust with a damp rag and let dry. I use polyacrylic varnish either by Minwax or Varathane. Varathane has a really cool matte varnish, but for this piece I used satin and gave it 2 coats.
Now to get the super smooth finish my pieces have, the next step is essential. I let it dry overnight. Then, using black sandpaper (800 grit or higher) and a small tub of water I wet sanded the table by dipping the sandpaper in the water and then GENTLY (you don’t want to remove the varnish- just smooth it) rub all over in circular motions until the piece feels smooth when you rub your hand over it. Wipe clean and let dry. Apply one last coat of varnish and Voila…
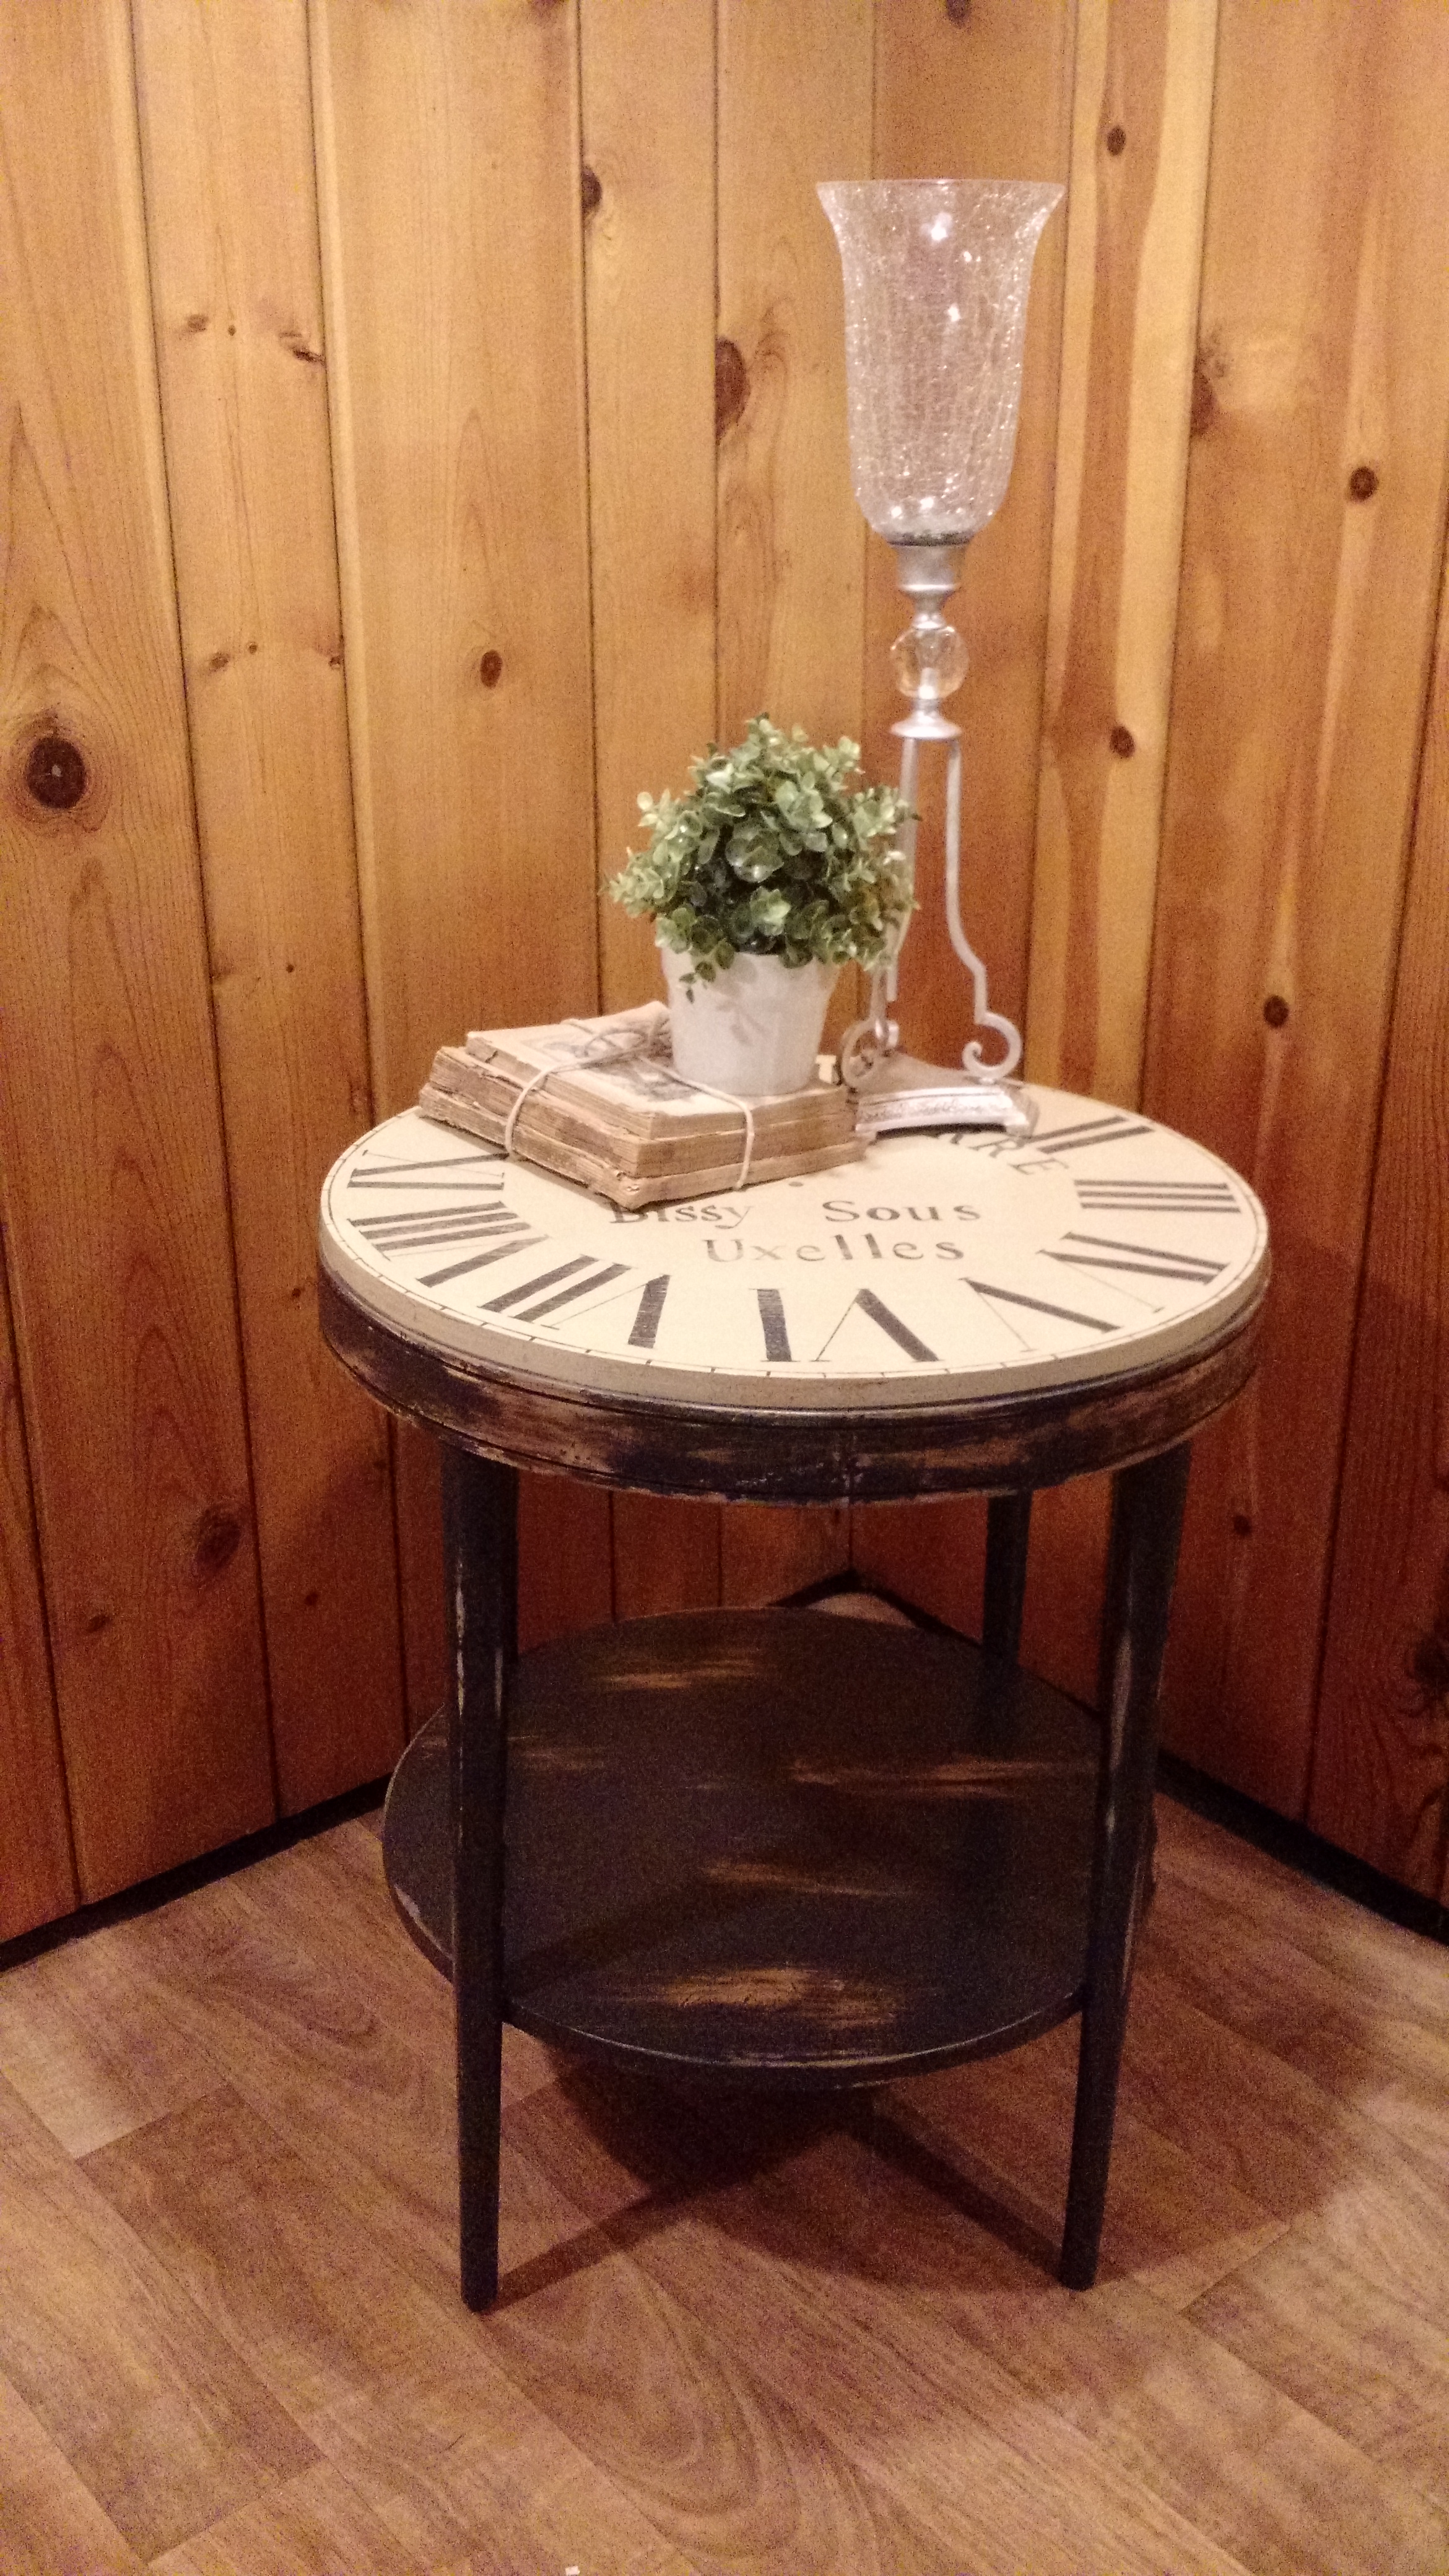
You’re done! From used table to fabulous clock table! This is really easier than it sounds and well worth the little extra steps to have a professional piece you will love for years to come. Thanks so much and visit me at Thistledew Restorations to see more pieces I will be explaining in future blogs!
By Denise Crites